
We use affiliate links. If you purchase something using one of these links, we may receive compensation or commission.
DIY Xeriscaping helps you create a low-water yard that looks great and saves money.
Many people struggle with high water bills and endless lawn care.
The good news? With the right plan, you can transform your yard into a drought-friendly space that’s easy to maintain.
This step-by-step guide makes it simple!
DIY Xeriscaping Key Takeaways
- DIY Xeriscaping is a water-efficient way to design a low-maintenance yard using drought-tolerant plants, mulch, and efficient irrigation.
- It reduces water use, saves money, and eliminates the need for constant lawn care.
- By following a step-by-step approach, you can create a sustainable outdoor space that thrives with minimal upkeep.
Budget-Friendly Xeriscaping for Beginners
Want a water-efficient yard without spending a fortune?
Xeriscaping can help you save money while still creating a beautiful outdoor space.
The trick is knowing where to cut costs without sacrificing results.
In this guide, you’ll find easy, budget-friendly xeriscaping tips to get started, from affordable plant choices to DIY irrigation hacks.
What is Xeriscaping and Why Should You Try It?

Xeriscaping is a simple way to create a beautiful yard without relying on constant watering.
It replaces thirsty lawns with drought-tolerant plants, mulch, and smart irrigation.
If you’re tired of high water bills and endless yard work, this method offers a practical, low-maintenance alternative.
Plus, it’s great for the environment!
Benefits of Xeriscaping
- ✅ Saves Water – Uses up to 75% less water than traditional yards.
- ✅ Low Maintenance – Less mowing, fertilizing, and weeding.
- ✅ Cost-Effective – Cuts down on water bills and landscaping expenses.
- ✅ Eco-Friendly – Supports local wildlife and reduces runoff pollution.
- ✅ Drought-Resistant – Plants thrive even in dry conditions.
DIY Xeriscaping Easy Step-by-Step Guide
DIY Xeriscaping Easy Step-by-Step Guide makes it simple to create a beautiful, low-maintenance yard while cutting back on water use.
If you’re tired of high water bills and endless lawn care, xeriscaping is the answer.
The best part? You can do it yourself with just a little planning and the right plants.
By choosing xeriscaping, you’ll enjoy a stress-free yard that looks great year-round. Ready to start? Let’s break it down step by step!
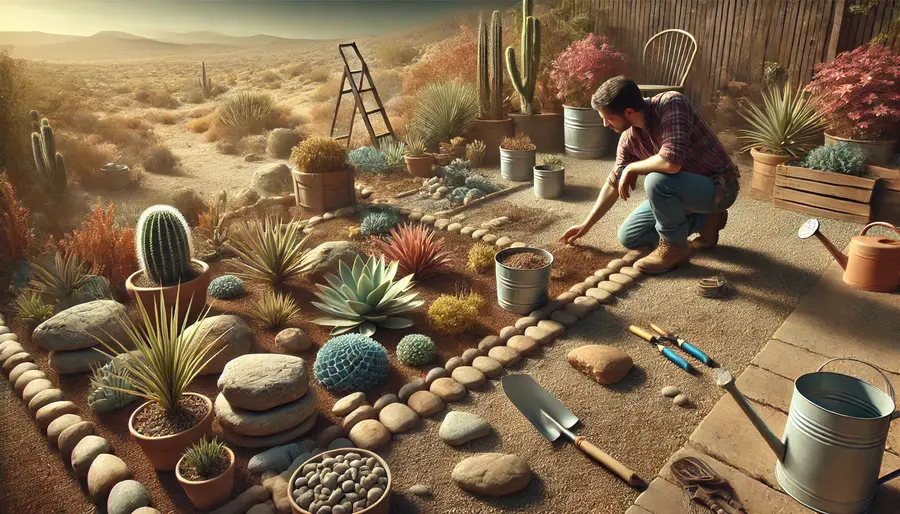
Step 1 – Plan Your Layout
Before you start digging, a solid plan will make your xeriscape both beautiful and functional.
Planning helps you choose the right plants, place them in the best spots, and make the most of natural water flow.
A well-thought-out layout also saves time and money in the long run.
Sketching Out Your Xeriscape
- Draw a rough layout – Map out the space, including existing trees, walkways, and structures.
- Decide on plant zones – Group plants with similar water needs together for easier maintenance.
- Include hardscaping elements – Plan for pathways, rocks, or decorative gravel to reduce plant coverage and upkeep.
Factoring in Sun Exposure and Drainage
Understanding your yard’s sun and water flow helps plants thrive with less effort.🌞
- Observe sunlight patterns – Note which areas get full sun, partial shade, or deep shade throughout the day.
- Check for slopes and runoff – Water naturally pools in low spots and runs off high areas. Plan plant placement accordingly.
- Improve drainage if needed – If your soil doesn’t drain well, consider raised beds or amending it with sand and compost.
With your plan ready, you can move on to Step 2
Step 2 – Remove Lawn and Prepare the Soil
Now that you’ve planned your xeriscape layout, it’s time to get rid of any existing grass and prep the soil.
Traditional lawns soak up a lot of water, so removing them is a big step toward a low-maintenance, drought-friendly yard.
Proper soil preparation will also help your plants thrive with minimal watering.
Best Methods for Removing Grass
- Sheet Mulching – Layer cardboard and mulch over the grass to smother it naturally. This method takes a few months but improves soil health.
- Solarization – Cover the area with clear plastic for several weeks. The heat from the sun kills grass and weeds.
- Digging or Sod Cutting – For a faster approach, remove the grass manually or with a sod cutter. It’s labor-intensive but works instantly.
Soil Amendments for Better Water Retention
Once the grass is gone, improving the soil will help retain moisture and support plant growth.
- Add Compost – Organic matter helps sandy soil hold moisture and improves drainage in clay soil.
- Mix in Perlite or Sand – If your soil is heavy, this keeps it from compacting.
- Test Your Soil pH – Many drought-tolerant plants prefer a neutral to slightly alkaline soil.
With your soil prepped, you’re ready for the fun part, choosing and arranging plants!
Get ready for Step 3 – Select the Right Plants!
Step 3 – Select the Right Plants
Choosing the right plants is one of the most important steps in DIY xeriscaping.
Not all drought-tolerant plants thrive in every climate, so it’s best to pick varieties that naturally do well in your region.
The right selection not only saves water but also keeps maintenance low and your xeriscape looking great year-round.
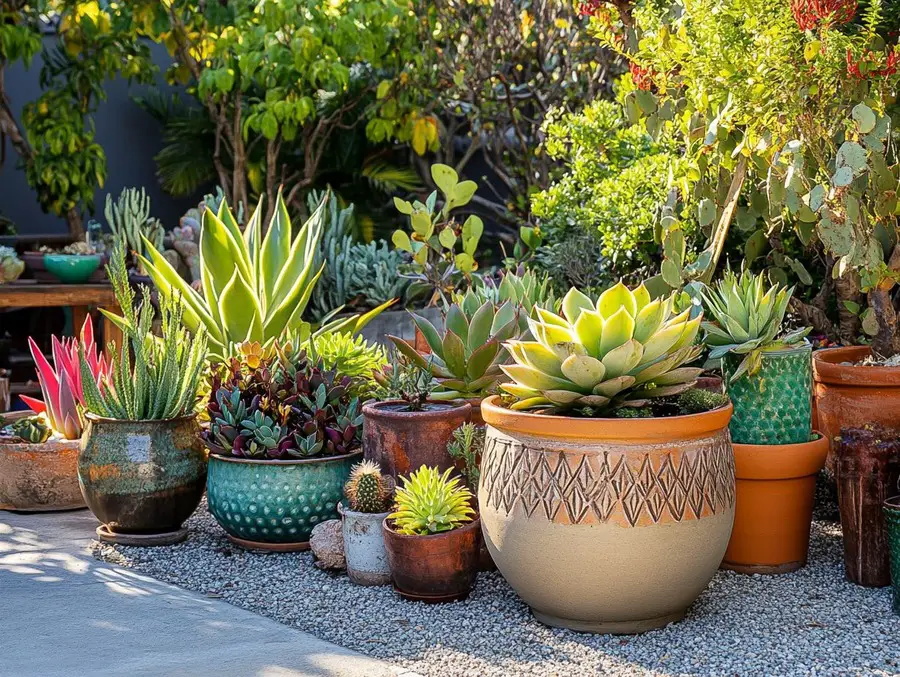
List of Beginner-Friendly Xeric Plants
If you’re new to xeriscaping, start with plants that require little care and can handle dry conditions. Here are some solid choices:
- Succulents – Agave, Aloe, Hens and Chicks, and Sedum
- Flowering Perennials – Blanket Flower, Black-Eyed Susan, Lavender, and Russian Sage
- Shrubs – Texas Sage, California Lilac, and Dwarf Myrtle
- Grasses – Blue Fescue, Buffalo Grass, and Mexican Feather Grass
- Ground Covers – Ice Plant, Creeping Thyme, and Lantana
Native plants are always a great choice since they’ve already adapted to your local soil and weather.
They’ll thrive with less water and attention than non-native species.
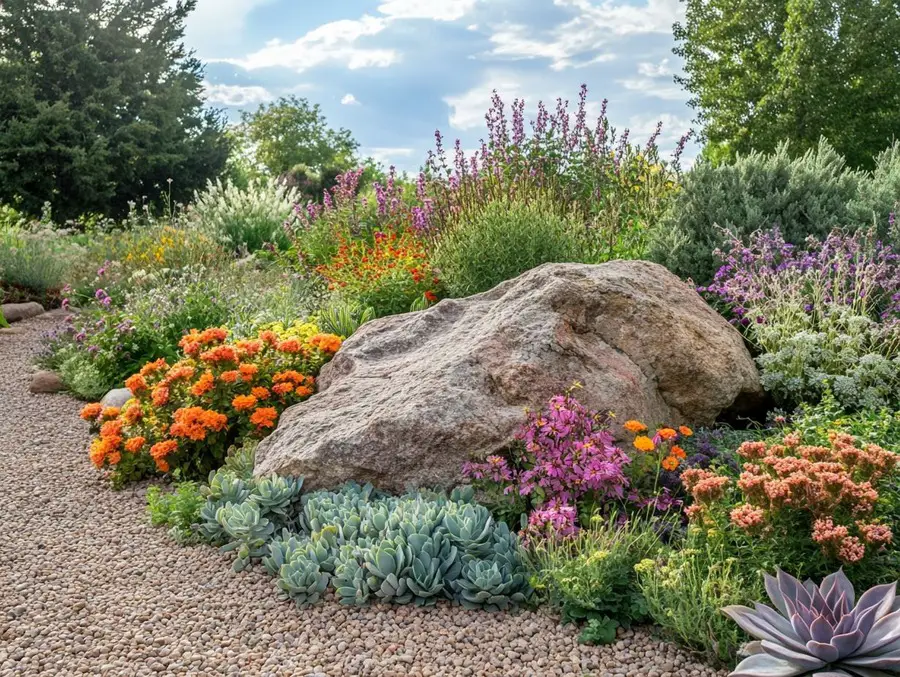
Arranging Plants for Visual Appeal and Efficiency
Once you’ve picked your plants, it’s time to place them in a way that looks good and makes watering easy.
- Group plants by water needs – Keep thirstier plants together so you don’t waste water on low-maintenance ones.
- Layer by height – Put taller plants in the back and shorter ones in the front for a natural, structured look.
- Mix colors and textures – Combine soft grasses with spiky succulents or bright flowers for contrast.
- Leave space for growth – Drought-tolerant plants often spread out, so give them enough room to mature.
With the right plants in place, your xeriscape will be both practical and beautiful.
Next up: Step 4 – Install Mulch and Ground Covers.
Step 4 – Install Mulch and Ground Covers
Mulch and ground covers are essential in DIY xeriscaping.
They help the soil retain moisture, prevent weeds, and keep your xeriscape looking polished.
The right choices can reduce watering needs and make maintenance even easier.
Choosing the Right Mulch for Weed Control
Mulch is a simple way to protect your xeriscape from weeds while keeping the soil cool and moist. Here are some of the best options:
- Organic Mulch (Wood Chips, Bark, Straw) – Slowly breaks down and adds nutrients to the soil.
- Inorganic Mulch (Rocks, Gravel, Decomposed Granite) – Great for hot climates and doesn’t need replacing.
- Recycled Mulch (Shredded Leaves, Grass Clippings, Newspaper) – Free and eco-friendly options to keep the ground covered.
When applying mulch, spread a 2-3 inch layer around plants, but keep it a few inches away from the base to prevent rot.
Low-Maintenance Ground Cover Options
Ground covers help fill empty spaces in your xeriscape while reducing soil erosion and keeping the area looking full. Some top choices include:
- Creeping Thyme – Drought-tolerant with tiny flowers that attract pollinators.
- Ice Plant – A low-growing succulent with colorful blooms.
- Dymondia – A tough, low-water ground cover that suppresses weeds.
- Lantana – Spreads quickly, thrives in the heat, and produces bright flowers.
Using a mix of mulch and ground covers will help lock in moisture and keep your xeriscape tidy.
Next up: Step 5 – Add Hardscaping Features.
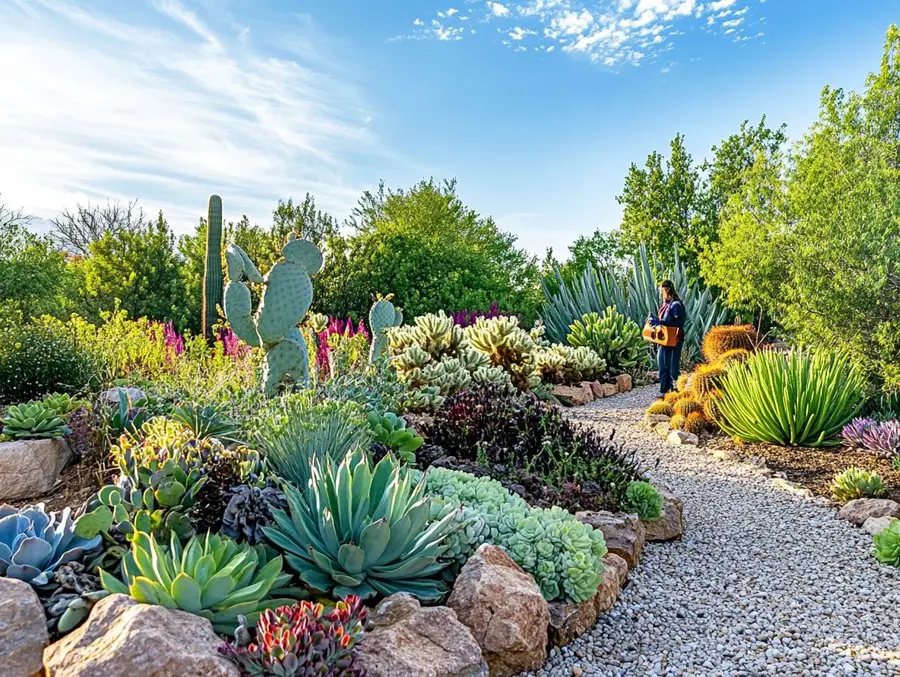
Step 5 – Add Hardscaping Features
Hardscaping adds structure and function to your xeriscape, making it both beautiful and practical.
Using gravel, rocks, and pathways helps reduce plant coverage, minimize maintenance, and create a visually appealing space.
Affordable Ideas for Rock Gardens, Pathways, and Borders
Hardscaping doesn’t have to be expensive. You can create stunning designs using budget-friendly materials and a bit of creativity.
- Rock Gardens – Use a mix of small and large rocks to create focal points. Choose heat-tolerant plants like succulents or cacti to complement them.
- Pathways – Gravel, stepping stones, or recycled bricks make great walkways that define your xeriscape and prevent soil erosion.
- Borders – Use repurposed materials like broken concrete, bricks, or driftwood to outline plant beds and keep mulch contained.
Enhancing Design with Gravel and Decorative Stones
Gravel and decorative stones are great for xeriscaping because they:
✅ Reduce water evaporation
✅ Help prevent weeds
✅ Provide a clean, finished look
Some popular gravel choices include pea gravel, decomposed granite, and crushed rock.
Use them to create dry riverbeds, define plant beds, or even replace a lawn completely.
With hardscaping in place, your xeriscape will look organized and require less maintenance.
Ready for Step 6 – Set Up an Efficient Watering System?
Step 6 – Set Up an Efficient Watering System
Even though xeriscaping focuses on drought-tolerant plants, a proper watering system is still important, especially when plants are first establishing roots.
Using the right irrigation method helps conserve water while keeping your plants healthy.
DIY Drip Irrigation Installation
Drip irrigation is one of the best ways to water a xeriscape efficiently.
Instead of spraying water everywhere, it delivers moisture right to the roots, reducing waste.
Here’s how to set up a simple DIY system:
- Choose a Drip Kit – Many affordable starter kits include tubing, emitters, and a timer.
- Lay Out Tubing – Run tubing along plant beds, keeping it close to the base of plants.
- Install Emitters – Place emitters near each plant to control the flow of water.
- Use a Timer – A simple irrigation timer ensures plants get watered at the best times, like early morning or late evening.
Drip systems save up to 70% more water compared to traditional sprinklers.
They also prevent overwatering and help roots grow deeper.
Using Rainwater Collection for Sustainability
Rainwater collection is another great way to water your xeriscape for free while reducing reliance on municipal water. Here are some easy ways to harvest rainwater:
✔️ Rain Barrels – Place a barrel under your home’s downspout to collect water. Use a spigot to fill watering cans or connect it to a drip irrigation system.
✔️ Soil Basins – Create shallow basins around plants to trap rainwater and direct it to the roots.
✔️ Permeable Pathways – Use gravel or porous pavers to allow water to soak into the ground instead of running off.
With the right watering setup, your xeriscape will thrive with minimal effort.
Let’s move on to Final Tips for Long-Term Xeriscape Success.
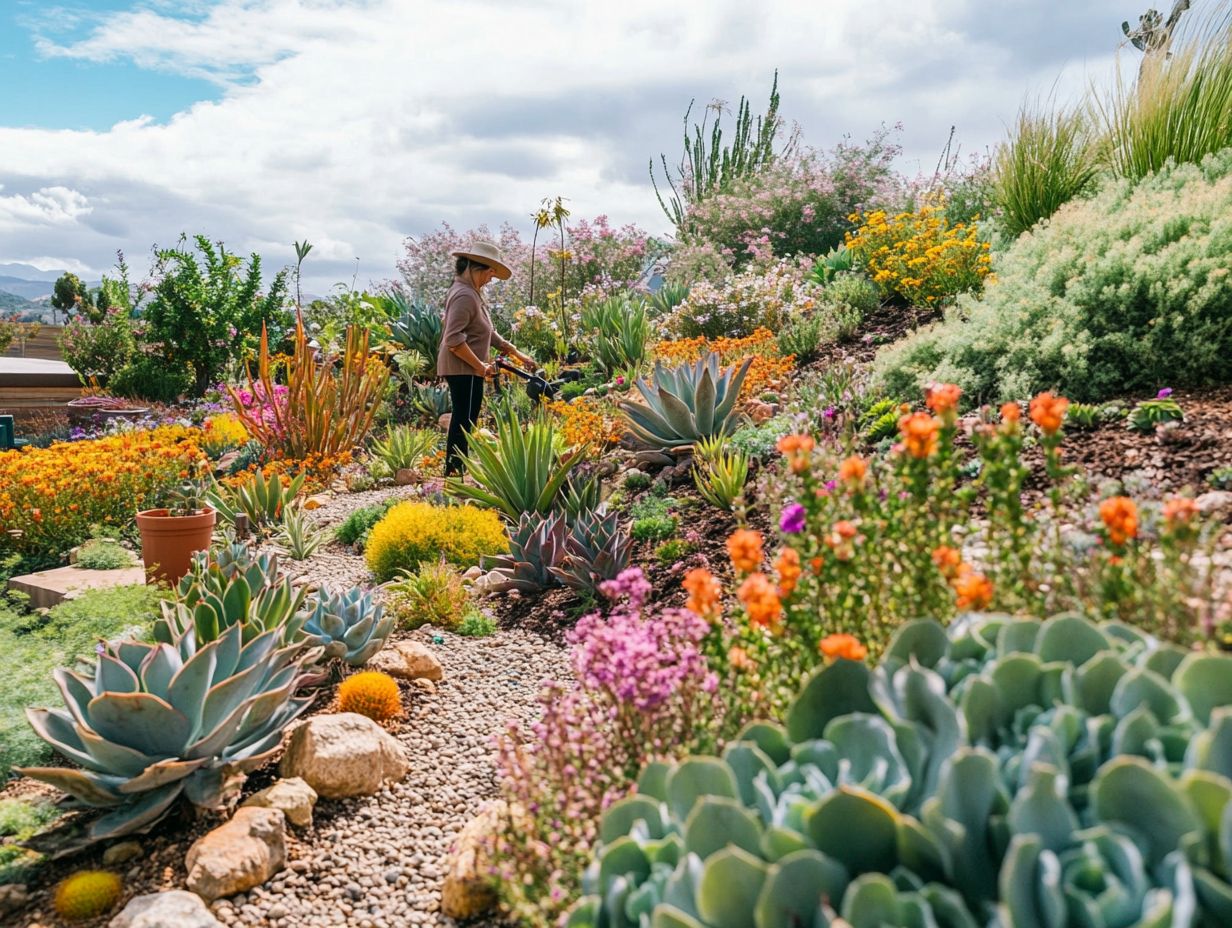
Final Tips for Long-Term Xeriscape Success
Xeriscaping is a low-maintenance way to create a beautiful yard, but that doesn’t mean it’s completely hands-off.
A little upkeep goes a long way in keeping your xeriscape healthy and looking great.
Seasonal Maintenance Checklist
Even drought-tolerant plants and rock gardens need occasional care. Here’s what to do throughout the year:
Spring
✔️ Check for winter damage and trim dead growth.
✔️ Refresh mulch to maintain moisture and control weeds.
✔️ Inspect irrigation lines for clogs or leaks.
Summer
✔️ Deep-water plants as needed, especially in extreme heat.
✔️ Remove weeds before they take over.
✔️ Prune overgrown plants to keep them tidy.
Fall
✔️ Collect fallen leaves and add them to compost or use them as mulch.
✔️ Divide perennials if they’ve become crowded.
✔️ Cut back on watering as plants prepare for dormancy.
Winter
✔️ Protect sensitive plants from frost using fabric covers or extra mulch.
✔️ Store rain barrels if freezing temperatures are expected.
✔️ Plan ahead for any additions or adjustments to your xeriscape.
Easy Troubleshooting Tips
If your xeriscape isn’t thriving, a few small tweaks can make a big difference.
- Plants look wilted despite little water? They may be overwatered. Adjust irrigation to prevent root rot.
- Weeds taking over? Add more mulch or pull weeds before they spread.
- Plants struggling in the sun? Some drought-resistant plants still need partial shade in extreme heat—consider moving them or adding shade elements.
With these simple maintenance steps, your xeriscape will stay healthy and beautiful year after year!
Let’s wrap things up with some FAQs
DIY Xeriscaping FAQs
Xeriscaping is a great way to create a low-maintenance, water-saving yard, but beginners often have questions.
Below are answers to some of the most common concerns.
Q. How do I start xeriscaping on my own?
A. Begin by sketching out your yard, removing unnecessary grass, and improving your soil.
Choose drought-resistant plants suited to your region, add mulch for moisture retention, and install a drip irrigation system for efficient watering.
Q. What’s the easiest xeriscape project for beginners?
A. A small rock garden or a mulched area with drought-tolerant plants is a great starting point.
These require minimal effort but still provide water savings and visual appeal.
Q. Do xeriscaped yards need maintenance?
A. Yes, but much less than traditional lawns. You’ll need to refresh mulch, remove weeds, and occasionally prune plants.
Seasonal care like checking irrigation systems and protecting plants from frost is also important.
Q. How long does it take for a xeriscape to establish?
A. Most xeriscapes take about a year to fully establish. Once plants have deep root systems, they require even less water and maintenance.
Q. Can I xeriscape a small yard or patio?
A. Absolutely! Container gardening with drought-tolerant plants, vertical gardens, and decorative rock features work well for small spaces.
Q. What are the best budget-friendly xeriscaping materials?
A. Use free or low-cost mulch like leaves or wood chips, repurpose stones and bricks for borders, and choose native plants that don’t need special soil or fertilizers.
Xeriscape Garden Design & Layout: Easy Water-Wise Beauty
What is xeriscaping? A beginner’s guide to drought-tolerant landscaping
Related Content


Visit my Amazon Influencer Page for videos and gardening products Grow Your Own Garden