
We use affiliate links. If you purchase something using one of these links, we may receive compensation or commission.
Discover the joys and benefits of growing microgreens at home! Dive into our guide for simple, effective tips on nurturing these nutritious greens in small spaces.
Growing Microgreens Key Takeaways:
- Growing Microgreens is a straightforward process involving planting quality seeds in a suitable medium.
- Providing adequate light and water, and harvesting them after 1-3 weeks.
- These nutrient-rich, flavorful greens are perfect for growing in small spaces.
- They enhance dishes and offer a fun, easy gardening experience.
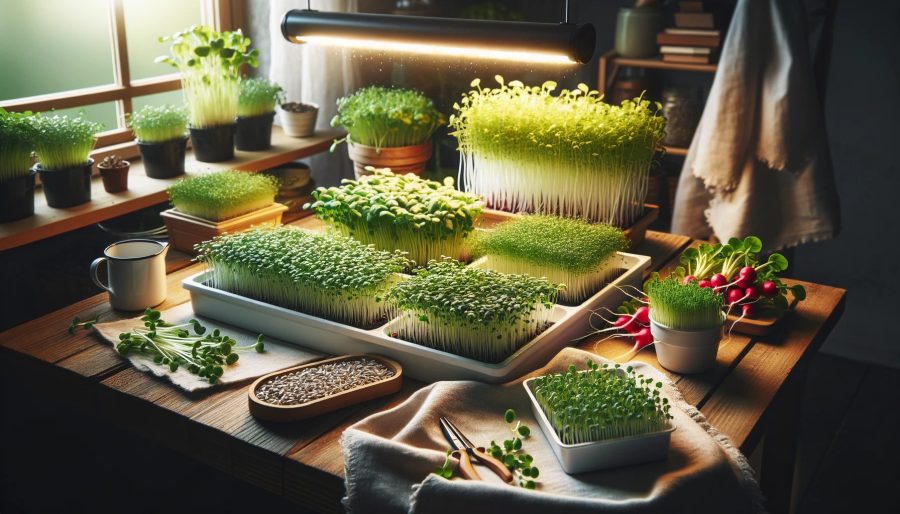
Welcome to the vibrant world of growing microgreens! Whether you’re a seasoned gardener or just starting, this guide offers practical tips and insights into cultivating these tiny yet mighty greens.
Perfect for urban dwellers and culinary enthusiasts, growing microgreens bring a burst of nutrition and color to your table and life.
I. Introduction to Growing Microgreens

Microgreens, the young seedlings of vegetables and herbs, have gained popularity in the world of indoor gardening and gourmet cooking.
These tiny greens, typically harvested just after the first leaves have developed, are not only a visual delight with their various colors and textures but are also packed with nutrients.
What are Microgreens?
Microgreens are the early-stage shoots of plants like arugula, basil, beets, and many others.
Unlike sprouts, microgreens are grown in soil or soil substitutes and require sunlight for growth.
They are usually harvested within one to three weeks after planting when they are about 1-3 inches tall.
Read more: Are microgreens the same as sprouts?
Nutritional Powerhouses in Tiny Packages
These miniature greens are nutrient-dense, meaning they contain higher levels of vitamins, minerals, and antioxidants compared to their mature plant counterparts.
For instance, research has shown that microgreens like red cabbage, cilantro, and radish contain up to 40 times higher levels of vital nutrients than their full-grown versions.
Culinary Uses of Microgreens
Microgreens are not just healthy; they’re versatile in the kitchen too. Chefs and home cooks alike use them to enhance the flavor, color, and texture of various dishes.
They are excellent in salads, sandwiches, and as garnishes on soups and main dishes. The delicate, yet distinct flavors they add can elevate a simple meal to gourmet status.
A Variety of Microgreens
There’s a wide variety of microgreens to choose from, each offering a unique taste and nutritional profile:
- Arugula: Peppery flavor, rich in antioxidants
- Basil: Sweet and fragrant, great for Italian dishes
- Beets: Earthy flavor, adds a splash of color
- Radish: Spicy and crisp, perfect for adding a kick to salads
- Sunflower: Nutty taste, adds crunch
- Pea Shoots: Sweet and tender, high in fiber
Exploring different types of microgreens can be a delightful journey.
Whether you’re a gourmet enthusiast or a health-conscious individual, there’s a microgreen for every taste and preference.
If you do not have space for a garden, believe that you do not have a “green thumb,” or are discouraged by your previous gardening experiences, do not despair! Microgreens may provide you with a newopportunity. PSU.edu
II. Getting Started: Growing Microgreens for Beginners
Starting your journey with microgreens is an exciting and accessible way to bring fresh greens into your diet.
This section outlines the essentials for beginners, ensuring a successful first batch of microgreens.
Essential Supplies for Growing Microgreens
To start, you’ll need a few basic supplies:
- Seeds: Choose high-quality microgreen seeds. Look for varieties like arugula, basil, or radish for diverse flavors and nutrients.
- Water: Fresh, clean water is crucial for germination and growth.
- Growing Medium: You can use soil, coconut coir, or hydroponic mats. Ensure it’s suitable for seed germination and is free of contaminants.
- Trays or Containers: Shallow trays work best. They should have enough depth to support the growing medium and roots.
Creating the Ideal Growing Environment
Microgreens don’t require a lot of space, making them perfect for indoor gardening. Here are key factors to consider:
- Light: Microgreens need plenty of light, but direct sunlight is not always necessary. A bright, sunny window or artificial grow lights can do the job.
- Temperature: Aim for a consistent temperature, ideally between 60-75°F (15-24°C). Avoid placing trays near heat sources or drafty windows.
- Humidity and Ventilation: Good air circulation is important to prevent mold growth. However, ensure the environment is not too dry to maintain adequate moisture for the seeds.
Step-by-Step Guide to Your First Batch of Microgreens
- Prepare Your Trays: Fill your trays with about an inch of moistened growing medium.
- Sow the Seeds: Distribute the seeds evenly across the surface. For most microgreens, you don’t need to bury them in the medium.
- Water Gently: Use a spray bottle to mist the seeds, ensuring the medium is moist but not waterlogged.
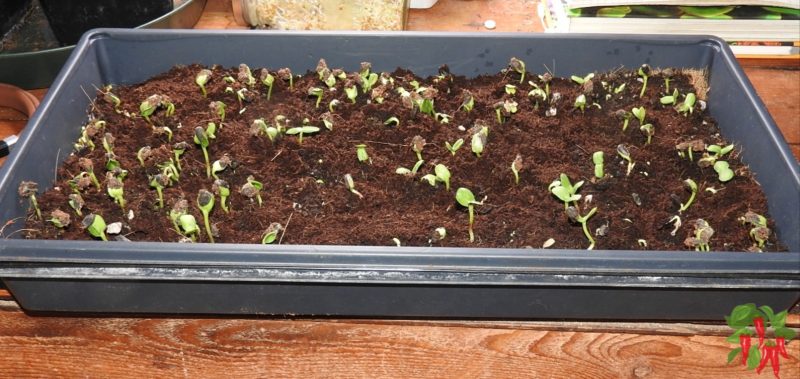
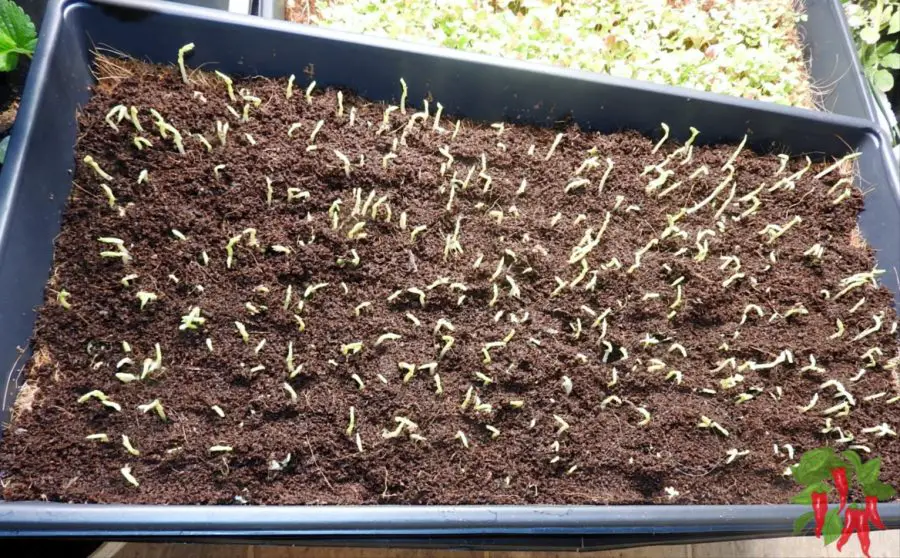
- Cover the Trays: Initially, cover the trays to create a dark, humid environment for germination.
- Uncover and Provide Light: Once the seeds have germinated (usually within 2-3 days), uncover and place them in a well-lit area.
- Watering: Continue to mist the microgreens as needed, keeping the medium consistently moist.
- Harvesting: In about 1-3 weeks, when the microgreens are a few inches tall and have developed their first true leaves, they’re ready to harvest. Use a sharp knife or scissors to cut them just above the soil line.
Table: Getting Started – Growing Microgreens for Beginners
| Requirement | Description |
|---|---|
| Seeds | High-quality microgreen seeds (e.g., arugula, basil, radish). |
| Water | Fresh, clean water for germination and growth. |
| Growing Medium | Soil, coconut coir, or hydroponic mats. |
| Trays/Containers | Shallow trays or containers, a few inches deep. |
Remember, microgreens are a great way to start your gardening journey.
They’re low-maintenance, fast-growing, and incredibly rewarding.
Enjoy watching your tiny greens sprout and add a fresh, nutritious boost to your meals!
III. Growing Microgreens Indoors
Indoor cultivation of microgreens offers a unique and rewarding gardening experience.
This section covers the advantages of growing microgreens indoors, how to set up your indoor garden, and tips for managing light and temperature for optimal growth.
Advantages of Indoor Cultivation
- Year-Round Growth: Indoors, you’re not limited by seasons. You can grow microgreens all year round, regardless of the weather outside.
- Control Over Environment: Indoor gardening lets you control factors like temperature and light, ensuring a consistent growing environment.
- Space Efficiency: Microgreens don’t need much space. A windowsill, countertop, or shelf can serve as your garden.
- Minimal Pests and Diseases: Growing indoors generally means fewer issues with pests and diseases compared to outdoor gardening.
Setting Up Your Indoor Microgreen Garden
- Choose the Right Spot: Find a space with sufficient light – near a sunny window or an area where you can set up grow lights.
- Select Appropriate Trays: Use shallow trays or containers that are a few inches deep.
- Prepare the Growing Medium: Fill your trays with a suitable growing medium – soil, coconut coir, or a hydroponic mat.
- Organize Your Space: Ensure your setup allows for easy watering and harvesting. Consider space for storing your gardening tools and supplies.
Managing Light and Temperature
- Lighting: If natural light is limited, use grow lights. Place them about 6-12 inches above the trays for 12-16 hours per day.
- Temperature: Keep your indoor garden at a consistent temperature, ideally between 60-75°F (15-24°C). Avoid placing your trays near heaters, air conditioners, or drafty windows.
- Monitoring and Adjusting: Regularly check your microgreens. Adjust the light and temperature as needed to ensure healthy growth.
By understanding and managing these elements, you can create an efficient and productive indoor microgreen garden.
The joy of harvesting fresh greens right from your home is a delightful experience, adding freshness and nutrition to your daily meals.
IV. Growing Mediums: Soil vs. Soilless Options
Choosing the right growing medium is crucial for the success of your microgreens. This section compares different types of mediums and outlines best practices for growing microgreens both in soil and soilless environments.
Comparing Different Growing Mediums
- Peat-Based Mixes: Peat-based mixes are popular due to their ability to retain moisture and support root growth. They are lightweight and typically mixed with other materials like perlite or vermiculite to improve aeration.
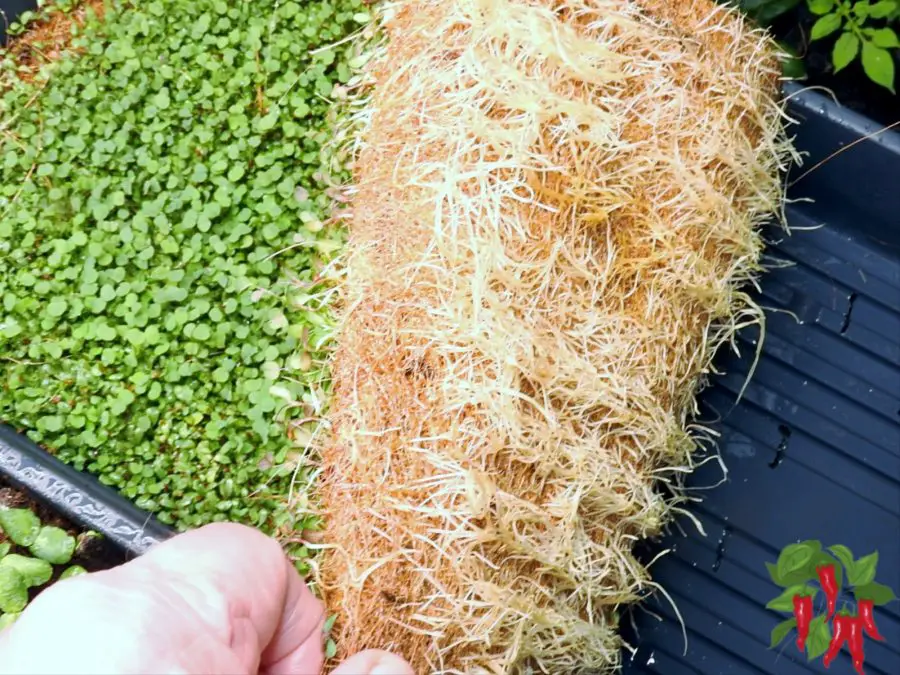
- Coconut Coir: Coconut coir is a sustainable, peat-free option made from coconut husks. It’s excellent for water retention and provides a good air-to-water ratio, promoting healthy root development.
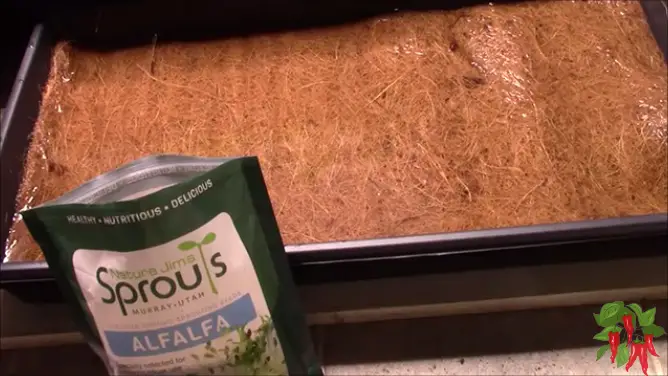
- Hydroponic Mats: Ideal for soilless growing, hydroponic mats are made from materials like cotton, hemp, coco fibers, or rockwool.
- They offer clean, mess-free cultivation and are great for controlling water and nutrients.
Growing Microgreens Without Soil
- Soilless Growing Benefits: Soilless growing reduces the risk of soil-borne diseases and pests. It’s cleaner and often more convenient, especially for indoor environments.
- Using Hydroponic Mats: Place the hydroponic mat in a tray, moisten it, and evenly spread the seeds. Ensure the mat stays moist but not overly saturated.
- Watering Practices: Watering is typically done from below to avoid disturbing the seeds. A tray beneath the growing mat can hold water, allowing the mat to absorb moisture as needed.
Best Practices for Each Medium
- For Peat-Based Mixes:
- Avoid over-watering as peat can retain a lot of moisture.
- Ensure your trays have proper drainage to prevent waterlogging.
- For Coconut Coir:
- Before planting, expand the coir with water and wring out excess moisture.
- Monitor the moisture level closely, as coir can dry out faster than peat.
- For Hydroponic Mats:
- Keep the mat evenly moist but not soaked.
- After harvesting, replace the mat to maintain hygiene.
Table: Growing Mediums – Soil vs. Soilless Options
| Medium Type | Characteristics | Best For |
|---|---|---|
| Peat-Based Mixes | Good moisture retention, needs mixing with perlite or vermiculite for aeration. | General microgreen cultivation. |
| Coconut Coir | Sustainable, great water retention and aeration. | Environmentally conscious growers. |
| Hydroponic Mats | Soilless, clean, and efficient water/nutrient control. | Soil-free growing, clean setups. |
Each medium has its unique characteristics and benefits.
Depending on your setup, preferences, and environmental considerations, you can choose the one that best fits your microgreen gardening needs.
Whether you opt for a traditional soil-based approach or explore soilless methods, the key is to provide a stable and nurturing environment for your microgreens to thrive.
V. Seed Selection and Preparation
Selecting and preparing the right seeds is a fundamental step in growing microgreens.
This section will guide you through choosing suitable seeds, understanding pre-soaking methods, and the best practices for seed density and sowing.
Choosing the Right Microgreen Seeds
- Variety Selection: Consider the flavors, growth rates, and nutritional values you desire. Popular choices include radish, broccoli, arugula, and mustard for their distinct tastes and easy cultivation.
- Quality of Seeds: Opt for seeds specifically labeled for microgreen use. These are usually untreated and non-GMO and are safe for consumption at the microgreen stage.
- Organic vs. Non-Organic: Organic seeds are preferred by many for their lack of chemical treatment, though non-organic seeds can also be used if they are untreated.
Pre-Soaking Methods for Different Seeds
- Understanding Pre-Soaking: Larger seeds or those with harder shells, like peas and sunflowers, benefit from pre-soaking. This softens the seed coat, promoting quicker and more uniform germination.
- How to Pre-Soak:
- Place seeds in a bowl and cover with water.
- Soak for the recommended time, usually between 4-12 hours, depending on the seed type.
- Drain and rinse the seeds before planting.
Seed Density and Sowing Techniques
- Calculating Seed Density: Seed density depends on the size and type of the seed. Smaller seeds like radishes can be sown more densely than larger seeds like sunflowers.
- Sowing Techniques:
- Evenly distribute seeds over the surface of your growing medium.
- For small seeds, gently press them into the medium without covering them. For larger seeds, a light covering of soil can be helpful.
- Watering After Sowing: Use a spray bottle to mist the seeds. Ensure they are moist but not overly wet.
Seed selection and preparation are critical steps in the microgreen growing process.
The right choices here set the foundation for a successful and bountiful harvest.
Understanding the specific needs of your chosen seeds will help you create the optimal growing conditions for your microgreen garden.
VI. Advanced Techniques
For those looking to take their microgreen growing skills to the next level, exploring advanced techniques like hydroponic cultivation, growing in jars, and using artificial lighting can offer new challenges and rewards.
This section delves into these methods, providing insights for enhanced microgreen growth.
Hydroponic Microgreen Cultivation
- What is Hydroponic Cultivation?: Hydroponics is the practice of growing plants in water-based, nutrient-rich solutions, without soil. It’s an efficient method for microgreens, allowing better control over nutrients and water.
- Setting Up a Hydroponic System:
- Choose a suitable hydroponic growing medium, like rockwool or coconut coir mats.
- Set up a tray system where the water can be circulated or replaced regularly to provide nutrients to the growing microgreens.
- Benefits: Hydroponic systems can result in faster growth and potentially higher yields. They also reduce the risk of soil-borne diseases.
Learn more about growing microgreens without soil.
Growing Microgreens in a Jar
- Jar Growing Method: This method is ideal for small spaces and offers a visually appealing way to grow microgreens.
- Steps to Grow in a Jar:
- Use clean, transparent jars and fill them with a suitable growing medium.
- Sow the seeds evenly and mist them with water.
- Cover the jar with breathable fabric or mesh to maintain humidity and airflow.
- Place the jar in a well-lit area or under grow lights.
- Advantages: Growing in jars is a simple and compact method, perfect for beginners or those with limited space.
Using Artificial Lighting for Enhanced Growth
- Importance of Lighting: Light is a crucial factor in the growth of microgreens. Artificial lighting can supplement natural light, especially in areas with limited sunlight.
Learn more about how much light microgreens need
- Choosing the Right Lights: LED grow lights are popular for their efficiency and low heat output. Fluorescent lights are also an option.
- Optimal Lighting Setup:
- Position fluorescent lights close to the microgreens, about 6-12 inches above the trays. LED lights might need to be further away depending on their strength.
- Provide 12-16 hours of light per day for balanced growth.
- Benefits: Consistent, adequate lighting can lead to faster growth and more vibrant microgreens.
Table VI: Advanced Techniques
| Technique | Description | Benefits |
|---|---|---|
| Hydroponic Cultivation | Growing plants in nutrient-rich water solutions without soil. | Faster growth, higher yield, less disease. |
| Growing in Jars | Using transparent jars with a growing medium for cultivation. | Space-efficient, visually appealing. |
| Artificial Lighting | Using LED or fluorescent lights for plant growth. | Consistent light source, year-round growth. |
By mastering these advanced techniques, you can optimize your microgreen growing process, experiment with new methods, and potentially increase your yield and efficiency.
Whether you’re a hobbyist looking to try something new or a commercial grower seeking to expand your operations, these techniques offer exciting possibilities.
VII. Growing Microgreens for Profit
Turning your microgreen hobby into a profitable business involves more than just growing greens.
It requires understanding the market, effective packaging and selling strategies, and scaling up your operations efficiently. Here’s how to navigate these aspects:
Market Analysis: Understanding Demand
- Research Your Market: Identify your potential customers. Restaurants, health food stores, farmers’ markets, and individual consumers are all viable options. Understand their preferences and needs.
- Analyze Trends: Stay informed about the latest trends in the health and culinary industries. Microgreens are often popular among health-conscious consumers and gourmet chefs.
- Competitive Analysis: Look at what other microgreen businesses are doing. Understand their pricing, varieties offered and marketing strategies.
Packaging and Selling Your Microgreens
- Attractive Packaging: Invest in high-quality, visually appealing packaging. Clear containers that showcase the freshness and color of your microgreens can be very effective.
- Labeling: Include labels with essential information like the microgreen variety, harvest date, and any instructions for storage or usage.
- Selling Channels: Consider various channels for selling your microgreens. Direct sales at farmers’ markets, subscriptions, online sales, and wholesale to restaurants or stores are all viable options.
- Marketing: Utilize digital marketing, social media, and local networks to promote your products. Building a brand and engaging with your community can be powerful tools for success.
Scaling Up Your Microgreen Business
- Efficient Production: As demand grows, consider how to increase production efficiently. This might involve expanding your growing area, automating certain processes, or improving growing conditions.
- Managing Finances: Keep a close eye on your costs and revenue. Understanding your profit margins is crucial for making informed business decisions.
- Diversification: Diversify your product range by introducing new microgreen varieties or related products. This can help you reach a broader market and increase sales.
- Building Relationships: Develop strong relationships with your customers and suppliers. This can lead to repeat business and referrals, which are invaluable for growth.
Table VII: Growing Microgreens for Profit
| Aspect | Focus Area | Details |
|---|---|---|
| Market Analysis | Understanding demand, and customer preferences. | Research market trends, and competitive analysis. |
| Packaging & Selling | Presentation and distribution of microgreens. | Quality packaging, effective labeling, and diverse selling channels. |
| Scaling Up | Expanding the microgreen business. | Efficient production, financial management, and product diversification. |
Growing microgreens for profit requires a blend of gardening skills, business acumen, and marketing savvy.
By understanding your market, presenting your product attractively, and efficiently scaling your operations, you can turn your passion for microgreens into a thriving business.
VIII. Troubleshooting Common Issues
Growing microgreens can sometimes present challenges.
Understanding how to tackle common issues, manage pests and diseases, and handle post-harvest processes is key to maintaining a healthy and productive microgreen garden.
Addressing Common Growing Challenges
- Uneven Growth: This can be due to inconsistent watering or uneven light distribution. Ensure that your watering is uniform and adjust your lighting setup so all plants receive equal light.
- Leggy or Pale Microgreens: Often a result of insufficient light. Consider using grow lights or moving your setup to a brighter location.
- Mold or Fungus: Overwatering or poor air circulation can lead to mold. Water less frequently, improve ventilation, and ensure your growing medium is not too dense.
Pest Management and Disease Prevention
- Prevention is Key: Keep your growing area clean, and use high-quality seeds and growing mediums to reduce the risk of pests and diseases.
- Identifying Pests and Diseases: Regularly inspect your microgreens. Common pests include aphids and fungus gnats, while diseases might manifest as spots or rotted stems.
- Natural Solutions: For pests, natural remedies like neem oil or insecticidal soaps can be effective. For diseases, remove affected plants immediately to prevent spread.
Harvesting and Post-Harvest Handling
- When to Harvest: Most microgreens are ready to harvest when they have developed their first true set of leaves, typically 1-3 weeks after planting.
- Harvesting Technique: Use a sharp knife or scissors to cut the microgreens just above the soil line. Be gentle to avoid crushing the delicate stems and leaves.
- Post-Harvest Care: Rinse the microgreens gently and pat them dry. Store them in an airtight container in the refrigerator. They typically last for about a week if handled properly.
Table VIII: Troubleshooting Common Issues
| Issue | Solution | Prevention |
|---|---|---|
| Uneven Growth | Check watering and light distribution. | Ensure consistent care and conditions. |
| Mold/Fungus | Improve ventilation, reduce watering. | Monitor humidity, avoid overcrowding. |
| Pests/Diseases | Use natural remedies, remove affected plants. | Maintain cleanliness, inspect regularly. |
By effectively addressing these common issues, you can ensure a robust and thriving microgreen garden.
Regular monitoring, good hygiene practices, and proper post-harvest care are crucial for maintaining the health and quality of your microgreens.
IX. Microgreen Varieties and Their Unique Properties
Microgreens come in a diverse array of varieties, each with its unique flavor profile and culinary uses.
Understanding these differences, as well as how microgreens compare to sprouts, can enhance both your gardening and culinary experiences.
Exploring Different Types of Microgreens
- Variety and Taste: Each microgreen variety has a unique taste. For instance, radish microgreens offer a spicy kick, while pea shoots are sweet and crunchy.
- Nutritional Value: Different microgreens offer various health benefits. For example, sunflower microgreens are known for their protein content, while red cabbage microgreens are rich in vitamins and antioxidants.
Flavor Profiles and Culinary Uses
- Culinary Versatility: Microgreens can be used in a multitude of dishes. Peppery arugula microgreens are great in salads or as pizza toppings, while the mild flavor of beet microgreens pairs well with sweet dishes.
- Gourmet Appeal: Chefs often use microgreens for their intense flavors and aesthetic appeal. Basil microgreens add a fresh touch to Italian dishes, and mustard microgreens can spice up a sandwich or burger.
Microgreens vs. Sprouts
- Growth Differences: Microgreens are grown in soil or a soil substitute and require sunlight, while sprouts are germinated seeds that are eaten whole, including the seed, root, stem, and undeveloped leaves, and are typically grown in water.
- Nutritional Content: Both are nutritious, but microgreens tend to have a higher concentration of certain vitamins and minerals.
- Texture and Use: Microgreens have a more varied texture and are used primarily as a garnish or ingredient in dishes, whereas sprouts are often used in sandwiches and salads for their crunchy texture.
By exploring the wide range of microgreens available, you can discover new flavors and textures to enhance your dishes.
Whether you’re a home cook or a professional chef, these tiny greens offer endless possibilities for culinary creativity.
X. Sustainable Practices in Microgreen Cultivation
Adopting sustainable practices in microgreen cultivation not only benefits the environment but also contributes to healthier growth and potentially better-tasting greens.
Here, we’ll explore eco-friendly growing mediums, water conservation techniques, and the benefits of using organic and non-treated seeds.
Eco-Friendly Growing Mediums
- Coconut Coir: A sustainable alternative to peat moss, coconut coir is a by-product of the coconut industry and is known for its excellent water retention and aeration properties.
- Compostable Mats: Some growers opt for biodegradable growing mats made from natural fibers like hemp or jute, which can be composted after use.
- Homemade Compost: Using homemade compost not only recycles kitchen and garden waste but also provides a nutrient-rich medium for microgreens.
Water Conservation Techniques
- Bottom Watering: This method involves watering the plants from below, reducing water usage and minimizing the risk of over-watering.
- Recirculating Systems in Hydroponics: For hydroponic setups, using a recirculating system can significantly conserve water, as the same water is cycled through the plants repeatedly.
- Monitoring Moisture Levels: Regularly check the moisture level of your growing medium to prevent both over-watering and under-watering, conserving water while ensuring healthy plant growth.
Organic and Non-Treated Seeds
- Benefits of Organic Seeds: Organic seeds are produced without synthetic pesticides or fertilizers, making them an environmentally friendly choice. They often yield healthier plants and, in turn, tastier microgreens.
- Avoiding Treated Seeds: Non-treated seeds are crucial for microgreen cultivation, as treated seeds may contain chemicals that could be harmful when the greens are consumed at a young stage.
Incorporating these sustainable practices into your microgreen cultivation not only contributes to environmental health but also enhances the quality of your greens.
By choosing eco-friendly materials, conserving water, and selecting organic seeds, you can enjoy your microgreens knowing you’re supporting sustainable gardening methods.
XI. FAQ: Growing Microgreens
As the interest in growing microgreens at home increases, many questions arise about their cultivation, care, and use. In this FAQ section, we address some of the most common queries to help you better understand and succeed in growing these nutritious and flavorful plants.
Q: How long does it take to grow microgreens?
A: Microgreens typically take between 1 to 3 weeks to grow, depending on the variety.
Fast-growing types like radish can be ready in as little as 7 days, while others, like sunflower, might take a bit longer.
Q: Can I grow microgreens without a garden?
A: Absolutely! Microgreens are ideal for indoor gardening due to their small size and low requirement for space.
You can grow them on windowsills, kitchen counters, or any space that receives sufficient light.
Q: Do microgreens need sunlight?
A: Microgreens require light to grow but it doesn’t have to be direct sunlight.
A bright room or artificial grow lights can provide enough light for healthy growth.
Q: What’s the difference between microgreens and sprouts?
A: Microgreens are grown in soil or a soil substitute and require sunlight, harvested after the first true leaves develop.
Sprouts are germinated seeds eaten whole (seed, root, stem, and undeveloped leaves) and are typically grown in water.
Q: How do I harvest microgreens?
A: Harvest microgreens by snipping them with scissors just above the soil line when their first true leaves have emerged.
This is usually about 1-3 weeks after planting.
Q: Are microgreens safe to eat raw?
A: Yes, microgreens are safe and nutritious to eat raw. They are often used in salads, sandwiches, and garnishes to add flavor and nutrition.
Q: How do I store harvested microgreens?
A: After harvesting, gently rinse and dry your microgreens. Store them in an airtight container in the refrigerator, where they can stay fresh for about a week.
Q: Can microgreens be regrown after harvesting?
A: Generally, microgreens do not regrow after harvesting. It’s best to start a new batch for continuous supply.
Q: What are the best microgreens for beginners to grow?
A: Easy varieties for beginners include radish, peas, sunflower, and mustard greens. They are relatively hardy and grow quickly.
This FAQ section aims to address your basic queries about growing microgreens. If you have more specific questions or need further information, diving into detailed resources or connecting with a local gardening community can be very helpful.
XII. Conclusion
Growing microgreens represents more than just a gardening activity; it’s a lifestyle choice that brings numerous benefits and joys.
Here’s a recap of why cultivating microgreens is so rewarding and how it encourages sustainable living.
The Benefits of Growing Microgreens
- Nutritional Value: Microgreens are nutrient-dense, offering a concentrated source of vitamins, minerals, and antioxidants.
- Culinary Enhancement: Their variety of flavors and textures make microgreens a delightful addition to many dishes, elevating everyday meals to gourmet levels.
- Educational and Fun: Growing microgreens is a simple and enjoyable way to learn about plants and gardening, making it an excellent activity for all ages.
- Therapeutic Effects: The process of nurturing plants and watching them grow is known to reduce stress and promote a sense of well-being.
Promoting Sustainable Living
- Reduced Environmental Impact: Growing microgreens at home reduces the need for transportation and packaging associated with store-bought greens, lowering your carbon footprint.
- Water Conservation: Microgreens require less water compared to traditional gardening, making them an eco-friendly option.
- Waste Reduction: Using compostable growing mediums and organic seeds contributes to a sustainable cycle that minimizes waste.
- Awareness and Education: Engaging in microgreen cultivation raises awareness about sustainable practices and the importance of fresh, locally-grown food.
In conclusion, growing microgreens is more than just a hobby; it’s a step towards a healthier, more sustainable lifestyle.
Whether you’re a seasoned gardener or a beginner, the world of microgreens offers endless opportunities to explore, learn, and contribute positively to your well-being and the environment.
Find out if you can regrow microgreens.
Related Content


Visit my Amazon Influencer Page for videos and gardening products Grow Your Own Garden